Article Summary:
- A sound Hawaii solar installation starts before any panel goes up, with real usage data, a roof evaluation, and a design matched to HECO’s current programs
- Mounting must match the roof type, since corrugated metal, standing seam, tile, flat, and shingle roofs each need different hardware and waterproofing
- Hilo’s humidity, rain, salt air, and pests call for corrosion-resistant materials, weatherproof electrical work, and protected wiring
- Wind design, permits, and inspections are quality checks, and every system should be permitted, inspected, and approved by the utility before it runs
- Battery systems need careful placement, a defined backup circuit panel, and a tested backup mode
- Aftercare, including monitoring, documentation, and annual checks, keeps a system performing for decades
- The federal homeowner solar credit ended after 2025, and Hawaii’s state credit changed in 2026, so confirm incentives in writing before you sign
- Our guide, Benefits of Solar Energy for Homes in Hawaii Explained, walks Hawaii homeowners through what to know before, during, and after a solar installation
Solar panels are simple devices. What decides how they perform for 25 years is the installation. In Hawaii the installation faces harder tests than on most of the mainland: salt air, constant humidity, heavy rain, strong wind, intense sun, rats and birds, vegetation that grows overnight, and a utility with its own interconnection rules.
This guide lays out the practices that separate a sound installation from a problem waiting to happen. It focuses on Hilo and the Big Island, but most of it applies across the islands. Use it as a checklist when you talk to any solar contractor in Hilo HI, including us. A good installer welcomes detailed questions, and a vague answer to a specific question tells you something too.
Why Installation Quality Matters More Here
Three features of Hawaii raise the stakes.
The climate is hard on materials. Hilo gets well over 100 inches of rain a year, humidity stays high, and many neighborhoods sit close enough to the ocean to catch salt air. Hardware that lasts decades in a dry inland climate can corrode in a fraction of that time here.
The grid is isolated. The Big Island’s electrical system is not connected to the mainland or to other islands. Hawaiian Electric reviews every interconnection with that in mind, and the rules for how your system must behave on the grid are specific.
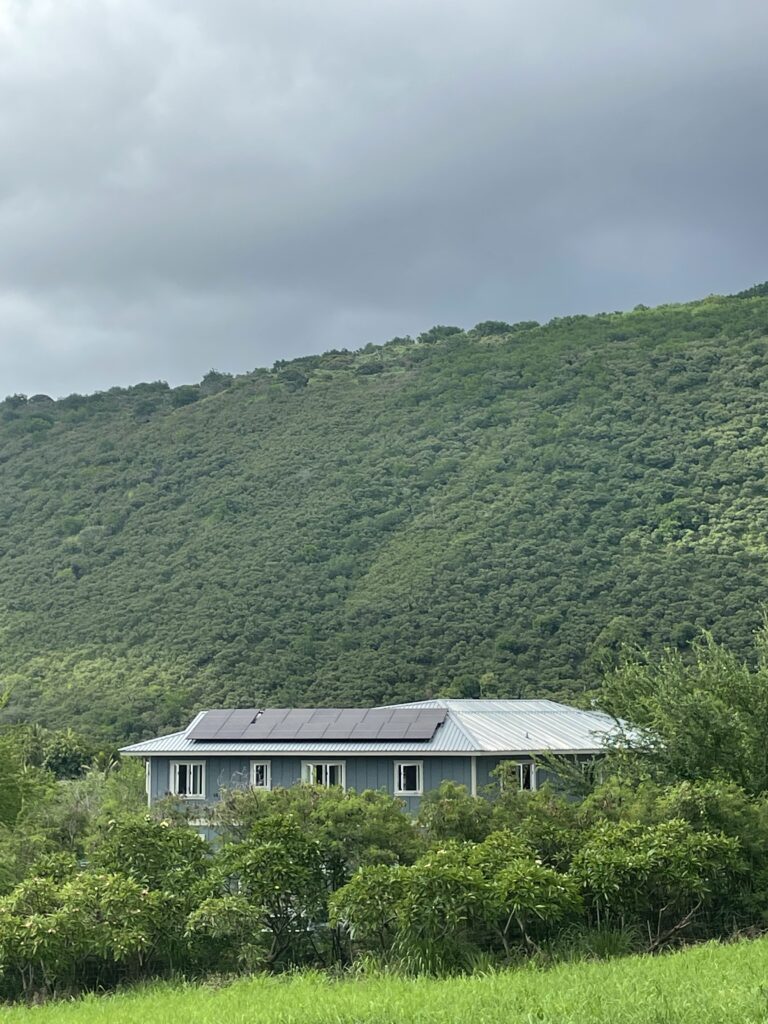
The housing stock is varied. Hilo has plantation-era homes with corrugated metal roofs, mid-century concrete block houses, tile-roofed homes from later decades, and newer homes with standing seam metal or shingles. No single mounting method fits all of them.
A crew that does this work in Hilo regularly has seen how each of these roofs and materials behaves over time. That experience is hard to substitute.
Step 1: Start With Real Energy Data
Every sound design begins with data, not a rule of thumb.
Gather 12 months of HECO statements
Twelve months shows seasonal swings, total kilowatt-hours, and the shape of your usage. A single bill or an estimated average can hide a summer peak or a winter dip. Your installer should ask for the full year and read it line by line.
Know that house size doesn’t predict usage
Two 2,000-square-foot homes can use very different amounts of electricity. Air conditioning, a pool pump, an electric water heater, a home business, an electric vehicle, and the number of people living in the house all change the total. Any quote built from square footage alone is a guess.
Plan for known changes
If you expect to buy an EV, add a mini-split, replace a gas appliance with an electric one, or have a family member moving in, tell your installer. Sizing for concrete near-term loads is reasonable. Sizing for vague future possibilities usually isn’t.
Ask how HECO’s current programs affect the design
Hawaiian Electric’s options for new rooftop solar customers pay much less for exported power than you pay for power you buy, and the rates differ by island and by time of day. Other customers choose a non-export option and size the system to cover only their own use. Program names, rates, and eligibility have changed several times, so ask your installer which program applies to your address today, what it pays, and how that shaped the system size they recommend.
The practical lesson is that a system sized to your real use generally performs better than one sized to fill the roof.
Step 2: Evaluate the Roof Before Anything Else
The roof carries the system for decades. Panels commonly carry 25-year warranties, so a roof with five years left is a poor foundation.
What a good roof evaluation covers
- Age and remaining life. Ask the installer to estimate how many years the roof has left and to explain how they came up with the number.
- Surface condition. On metal roofs, look for rust, thinning, loose or backed-out fasteners, and failed sealant. On tile, look for cracked or slipped pieces. On flat roofs, look for ponding, blisters, and patched areas. On shingles, look for curling, granule loss, and soft spots.
- Structure. The rafters, purlins, or deck need to hold the added weight and wind load, and mounts need to reach solid framing. Signs of past leaks or rot in the attic deserve attention.
- Past leaks. Water stains on ceilings or in the attic mean you should fix the cause before panels cover the area.
- Obstructions. Vents, skylights, chimneys, and roof edges all affect where panels can go.
Decide whether to re-roof first
If the roof will need replacement within several years, doing it before the solar install is usually cheaper than removing and reinstalling panels later. Panel removal and reinstallation is a common, manageable job, but it adds cost, and every disturbance of the roof is another chance for a leak.
Document the starting condition
Photos of the roof before work begin protect both you and the contractor. They show what was already worn and help sort out any dispute later.
A contractor who calls the roof fine without climbing up to look hasn’t evaluated anything. A contractor who tells you the roof needs work first may be costing themselves a sale, but they’re doing right by you.
Step 3: Match the Mounting Method to Your Roof
Using the wrong method for a roof type is one of the most common causes of leaks. Here is how each common Hilo roof should be handled.
Corrugated metal roofs
Corrugated metal is common on older Hilo homes and on many outbuildings.
- Mount to the raised ribs with hardware made for that profile, rather than through the flat valleys where water runs.
- Use fasteners and sealing materials rated for the metal and for UV and constant moisture.
- Check the metal at each attachment point. Thin, rusted, or deformed metal can’t hold a mount and may need repair first.
- Confirm that the attachments reach the purlins or other structural members underneath.
Penetrations through the valleys sit right in the drainage path. Water finds them first.
Standing seam metal roofs
Standing seam roofs have raised vertical seams that run from ridge to eave.
- Use non-penetrating clamps that grip the seams, matched to your specific seam profile.
- Don’t drill through the panels. Penetrations create leak paths, and drilling may void the roofing manufacturer’s warranty.
- Confirm that the clamp manufacturer lists your seam type and that the roof’s gauge and condition suit the clamp.
- Follow the clamp manufacturer’s spacing and setscrew torque instructions.
Concrete and clay tile roofs
Tile roofs shed water through overlapping pieces, so every mount has to respect that system.
- Install hooks or flashed standoffs fastened to the roof structure beneath the tile, not to the tile itself.
- Cut or notch tiles carefully at the mount points, and use flashing designed for tile so water still drains correctly.
- Plan walking paths. Tile breaks under foot, and a cracked tile can let water through.
- Replace any piece broken during the job.
Tile roofs take more labor to do well, and a contractor who has done many of them will usually handle breakage and flashing better than one who has done a few.
Flat and low-slope roofs
Many older concrete block homes and some commercial buildings have flat or nearly flat roofs.
- Use an attachment approach matched to the roof: a ballasted frame that sits on the roof surface, or a mounted system with properly flashed penetrations.
- Confirm that the structure can carry the added weight, including the ballast if used.
- Check the membrane and drainage first. Ponding water and an aging membrane make a poor base.
- Follow the roof manufacturer’s rules for penetrations and warranties.
Asphalt shingle roofs
- Install flashed mounts under the shingles, fastened into rafters, with the correct sealant for tropical humidity and UV.
- Don’t count on sealant alone to keep water out. Flashing does that job, and sealant backs it up.
- Replace any shingles damaged during installation.
The rule for every roof type
Every attachment point is a potential leak. The best installers treat each one as a waterproofing task first and a mounting task second.
Step 4: Choose Materials Built for Hawaii
Corrosion is one of the main long-term threats to Hawaii solar systems, and it shows up in places that are easy to overlook.
Hardware and fasteners
- Stainless steel and anodized aluminum are common choices. Ask which grade of stainless steel is specified, especially close to the coast.
- Avoid mixing incompatible metals where moisture can sit between them. Dissimilar metals in wet conditions corrode each other.
- Check coatings. Standard zinc-coated hardware may look fine on day one and show rust within a few years in a wet, salty setting.
- Use rated hardware from established racking manufacturers, and keep the documentation that shows the load ratings.
Wiring, conduit, and connectors
- Use outdoor-rated, UV-resistant wire and conduit.
- Seal conduit entries so water can’t follow the pipe into the building or junction box.
- Choose weatherproof junction boxes and fittings. Confirm that connectors between panels are fully seated, because loose connectors cause heat and failures.
- Support wiring properly. Cables that sag or rub on roof edges wear through.
Panels
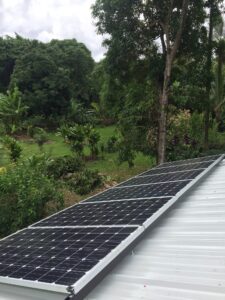
Panel choice should reflect the climate. Compare warranty terms, degradation rates, and temperature performance, and ask for independent test data on humidity and heat resistance. Panels in warm places lose a bit of output when hot, so a lower temperature coefficient helps.
Sealants and flashing
Use sealants rated for UV, heat, and constant moisture, apply them to clean, dry surfaces, and follow the cure time. Wet or dirty surfaces prevent a good bond.
Ask your installer to name the specific products in your proposal and explain why they suit Hilo. “Premium” and “high quality” aren’t specifications.
Step 5: Protect the System From Pests and Wildlife
This is a practical issue in Hawaii that general guides skip.
Rats and other rodents chew wiring, and birds nest under panels. Damaged insulation can cause faults, fires, or lost production.
Best practices:
- Install mesh or critter guards around the array’s edges so animals can’t nest underneath.
- Secure and bundle wiring off the roof surface and away from places rodents can reach.
- Seal gaps where conduit enters the building.
- Trim tree branches that give animals access to the roof.
- Check for signs of nesting during annual inspections.
Step 6: Design for Wind, Structure, and Water
Wind design
Hawaii’s building code sets wind design requirements, and permit applications for solar typically include structural calculations for the mounting system. The calculations are only as good as the installation that follows them.
- Build exactly what the drawings show. Attachment spacing, hardware type, and fastener size should match the permit documents.
- Hit solid framing. Fasteners that miss the rafter or purlin can’t carry the load.
- Give extra care to edges and corners, where wind forces are highest.
- Follow torque specifications and verify them.
- Keep wiring supported and tidy, so it doesn’t whip or chafe.
Water and drainage
- Position conduit and junction boxes to shed water, not collect it.
- Slope drip loops where wires enter enclosures.
- Don’t block drainage paths on roofs or gutters.
- Keep equipment out of low spots where water pools.
Flood and tsunami zones
Some Hilo neighborhoods, including parts of downtown and Keaukaha, fall within flood or tsunami evacuation zones. If you live in one, ask your installer about placing inverters and batteries above likely flood heights and what your insurer requires.
Step 7: Get the System Design Right
Design choices made at a desk shape performance for decades.
Shading analysis
Hilo’s vegetation grows fast. A good analysis measures shade through the day and across the seasons, using a site tool or modeling software, and it accounts for how trees will look in a few years. A designer who looks only at a satellite image may miss a tree, a power pole, or a neighbor’s building.
Inverter choice
- String inverters cost less and suit roofs with uniform sun exposure and little shade.
- Microinverters convert power at each panel, so shade or a fault on one panel doesn’t pull down the others, and they give panel-level data.
- Optimizers with a string inverter offer panel-level control at a price between the other two.
The right choice depends on your roof, shading, budget, and the warranty you want. A good designer explains the tradeoffs for your home instead of defaulting to one product for everyone.
Inverter location
Mount inverters where they stay cool, shaded, and dry, with the clearances the manufacturer requires. Direct afternoon sun and tight enclosed spaces cause heat problems, and low locations may flood.
Layout and orientation
In Hawaii, south-facing roof planes generally produce the most, but east- and west-facing planes can still work well. Keep panels within the setbacks and access pathways required by local fire code, and leave room for roof access and maintenance.
Realistic production estimates
Ask which tool produced the estimate and what it assumed for sun hours, shading, and system losses. Compare it with an independent calculator. If one proposal’s estimate is far above the others for the same roof, ask why.
Step 8: Do the Electrical Work to Code
Solar is an electrical system tied to your home and to the grid. Code compliance is a safety matter.
Licensing
Verify your contractor through the Hawaii Department of Commerce and Consumer Affairs license lookup before signing. Ask which license classification covers the electrical and PV work, confirm it’s active, and read the disciplinary history. Also ask for proof of insurance.
Your main electrical panel
Older panels may have no free breaker space, insufficient capacity, or known reliability problems. Some need an upgrade before solar can be added. A good site visit includes opening the panel (or asking you to) and looking inside.
Required safety equipment
A compliant system includes, among other items:
- Rapid shutdown equipment that reduces voltage on the roof quickly when activated
- Disconnects in accessible locations
- Overcurrent protection sized for the equipment
- Proper grounding and bonding
- Clear labels at the equipment, the panel, and the meter
Hawaii County enforces the electrical code edition it has adopted, along with local amendments. Your contractor should know which one applies.
Equipment listings
Inverters connected to the grid should carry the applicable listing for grid-tied equipment. Utilities and inspectors check for it.
Workmanship
Neat, supported conduit, clean terminations, tidy labels, and a well-organized equipment area usually signal careful people. Messy work often hides other problems.
Step 9: Permit the Job and Get Utility Approval
Permits and interconnection approval are two separate processes. Neither is optional.
Hawaii County building permit
Your contractor prepares and submits drawings, electrical diagrams, equipment specification sheets, and structural calculations. The county reviews them for code compliance, and an inspector checks the finished work against the plans.
Utility interconnection
Hawaiian Electric reviews your system for compatibility with its grid. Depending on how much solar is already on your neighborhood circuit, it may require specific inverter settings or review. Don’t energize the system until the utility grants Permission to Operate.
Best practices
- Never skip permits. Unpermitted work can cause problems with insurance, resale, and safety, and it leaves you with little recourse if something goes wrong.
- Submit complete applications. Incomplete ones get returned and add weeks.
- File with the county and the utility at the same time where possible.
- Plan for months, not weeks. Timelines from contract to Permission to Operate often run several months and vary with workload and circuit conditions. Anyone promising a few weeks should explain how.
- Keep copies of the permit, inspection sign-off, and utility approval.
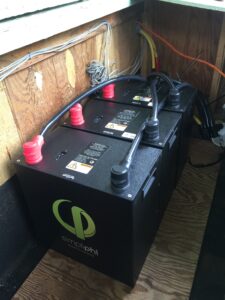
Step 10: Install Battery Storage Properly
Batteries add equipment, wiring, and safety requirements, so they deserve their own practices.
Plan the backup
- Run a load analysis. Decide which circuits the battery will back up and for how long. Backing up the whole house takes far more capacity than backing up a refrigerator, lights, internet, and a few outlets.
- Account for big loads. Air conditioning, well pumps, electric water heaters, and dryers draw heavily, and they can drain a battery quickly.
Choose the location carefully
- Follow the manufacturer’s rules for clearances, temperature range, ventilation, and protection from water and impact.
- Check local code and fire rules on indoor, garage, and outdoor placement.
- Keep batteries above likely flood levels.
Wire it correctly
- Use a dedicated backup or critical-loads panel where the design calls for it.
- Follow the manufacturer’s installation and commissioning instructions exactly.
- Make sure the system disconnects from the grid properly during an outage.
Test it
After installation, test that the system actually transfers to battery power in a simulated outage and that your chosen circuits stay on. Many problems only show up when you try it.
Configure the settings
Reserve levels, charging priorities, and time-based settings affect both savings and backup duration. Ask how to charge the battery to full before a storm and how to switch modes.
If you’re asking about battery incentives, ask whether any Hawaiian Electric battery program is open to you and what it requires before you buy.
Step 11: Follow a Good Installation-Day Routine
Careful crews work through a consistent sequence.
- Protect the property. Cover landscaping, set up fall protection, and handle roofing materials carefully.
- Mark the layout and verify it against the permitted drawings.
- Locate framing and install attachments at the designed positions.
- Flash and seal each penetration right away, not at the end of the day.
- Mount rails and panels, and torque connections to specification.
- Run and secure wiring, and keep conduit tidy.
- Complete the electrical work with licensed personnel.
- Label and test before leaving.
- Clean up all packaging, cut conduit, and fasteners.
- Walk the homeowner through the system: where the equipment is, how to read the monitoring app, how to shut down in an emergency, and who to call.
Weather
Rain in Hilo can arrive without much warning. A careful crew doesn’t leave open roof penetrations before a storm, and it covers exposed work when weather turns.
Safety
Look for fall protection, tidy work areas, and clear communication about where crews will be. These habits go together with good workmanship.
Step 12: Inspection, Commissioning, and Handover
The job isn’t done when the last panel goes up.
County inspection
An inspector verifies the work against the permit and code. Corrections are common and normal. A good contractor handles them promptly.
Utility approval
After inspection, HECO issues Permission to Operate. Don’t turn the system on before that.
Commissioning checks
- Confirm each panel, microinverter, or string reports production.
- Confirm the monitoring app is connected to your Wi-Fi and shows live data.
- Test rapid shutdown.
- Confirm the system’s settings match the utility’s requirements.
- Record the starting production on a clear day.
Documentation
Keep one folder, paper or digital, with:
- Signed contract and proposal
- Permit and inspection sign-off
- Utility approval letter
- As-built drawings and wiring diagram
- Equipment model and serial numbers
- All warranty documents
- Installer contact and warranty claim instructions
You’ll need this for insurance, resale, and any repair.
Step 13: Maintain the System for the Long Run
A simple schedule
| When | What to do |
| Weekly or monthly | Glance at the monitoring app and compare production with similar weather days |
| After storms | Look for debris, damage, and unusual production drops, and call your installer for anything suspicious |
| Every few months | Check for leaves, bird droppings, and growth on or around panels |
| Once a year | Have hardware, sealant, wiring, and roof penetrations looked at, especially in the first years |
| As needed | Trim vegetation that shades panels or could fall on them |
Cleaning
Rain handles much of the cleaning in Hilo, but debris near trees can build up. Use gentle methods and follow the panel manufacturer’s cleaning guidance, and don’t walk on panels or use harsh chemicals.
Warranty claims
Know who to call, what documentation they’ll want, and how long each warranty runs. Equipment warranties come from manufacturers, and the workmanship warranty comes from your installer.
Planning for roof work
If you re-roof later, panels must come off and go back on. Get your installer involved early so the work is scheduled properly.
Common Installation Mistakes to Avoid
Mounting through the wrong part of the roof. Penetrations in corrugated valleys or standing seam panels invite leaks.
Using hardware that isn’t rated for the climate. Corrosion often shows up years later, when the warranty has run its course.
Missing the framing. Attachments that don’t reach structure weaken the whole system.
Skipping or rushing the permit. The shortcut creates risk with insurance, resale, and safety.
Oversizing the system. Extra capacity earns little when exports are paid well below the retail rate.
Ignoring shade that will grow. A small tree today may shade the array in a few years.
Weak or missing sealing and flashing. The most common failure point on any roof.
Cramped or poorly chosen equipment locations. Heat, moisture, and flood exposure shorten equipment life.
No pest protection. Rodents and birds cause expensive problems quietly.
Incomplete handover. If you don’t know how to read the app or shut the system down, small issues linger.
Money Matters: Incentives and Financing in 2026
Incentives changed this year, so verify them before you rely on any quote.
Federal credit. The 30% federal credit for homeowner-owned solar systems ended for systems installed after December 31, 2025. If a company promises a 30% federal credit on a new installation, ask them to explain it in writing.
Hawaii state credit. The state credit has been 35% of system cost, up to $5,000 for a single-family system. The legislature changed the credit in 2026, with reported income limits, a statewide annual cap, and a scheduled end in 2030, and an executive order preserved it for 2026 projects. Check the Hawai’i State Energy Office and a tax professional for the current rules.
Third-party contracts. Leases and power purchase agreements may use a separate business credit through 2027, but the contracts run for decades. Read the escalator, buyout, and transfer terms before signing.
Financing fees. Some solar loans include a dealer fee that raises the amount you borrow. Ask for the all-in financed amount and compare it with a credit union or bank loan.
Questions to Ask Any Installer
About the company
- What is your Hawaii contractor license number, and which classification covers this work?
- How long have you worked on the Big Island, and how many Hilo installations have you completed?
- Are the people on my roof your employees or subcontractors?
- Can I speak with Hilo customers whose systems have run for at least a year?
About my roof
- How will you mount to my roof type, and what hardware and sealant will you use?
- How did you judge my roof’s remaining life?
- What happens if you find rot or damage once work starts?
About the design
- What assumptions went into the production estimate?
- How did HECO’s current programs affect the size you recommend?
- Why this inverter type for my roof?
About materials
- Which exact panels, inverters, and racking are in the quote, and why do they suit Hilo?
- What fastener grade will you use?
About permits and timing
- Who handles the county permit and the utility application?
- What’s a realistic timeline, and what could delay it?
About aftercare
- What does the workmanship warranty cover, and for how long?
- Who do I call if something stops working, and how fast do you respond?
A Pre-Signing Checklist
- [ ] 12 months of HECO bills gathered
- [ ] Roof inspected, with remaining life discussed
- [ ] Mounting method named for my roof type
- [ ] Specific equipment models and corrosion-resistant hardware listed
- [ ] Structural and wind design included in the permit
- [ ] Contractor license and insurance verified
- [ ] HECO program and export treatment explained
- [ ] Panel capacity and electrical work addressed
- [ ] Permit, inspection, and utility approval included in the contract
- [ ] Pest protection and equipment placement discussed
- [ ] Workmanship warranty in writing
- [ ] Incentives confirmed in writing
- [ ] Financing fees disclosed
- [ ] Monitoring and aftercare explained
Frequently Asked Questions
How long does a solar installation take in Hawaii?
The physical work often takes one to a few days. Permitting, inspection, and utility approval commonly add months.
Do I need a permit for solar in Hawaii?
Yes. Solar systems need building and electrical permits, and the utility must approve interconnection.
Which roof is best for solar?
Any common roof can work if it’s in good condition and the mounting method suits it. Standing seam metal allows non-penetrating mounting. Older roofs often need repairs first.
Is salt air a problem?
It can be near the coast. Corrosion-resistant hardware and good sealing matter most.
Can I switch my system on right after installation?
No. Wait for the county inspection and HECO’s Permission to Operate.
Can I install solar myself?
Hawaii requires licensed professionals for the electrical work, and permits and utility approval add more requirements. For most homeowners, hiring a licensed contractor is the practical route.
Should I add a battery?
It depends on how much outages matter to you and how your utility program values stored energy. A load analysis helps you decide.
Do panels need cleaning in Hilo?
Rain does much of the work, but check for debris and buildup near trees.
How often should I have my system inspected?
Watch the monitoring app regularly, and have hardware and wiring checked once a year.
What if my roof needs replacing later?
Panels can be removed and reinstalled. Plan it with your installer, and budget for the extra cost.
Install With Solar Saint
Solar Saint is a locally owned solar company based in Hilo with more than 300 completed projects. We install grid-tied and off-grid systems, battery storage, and EV charging, offer 24/7 emergency repair, and handle permits, paperwork, installation, and monitoring.
We start with your HECO bills and your roof, tell you what we’d do and why, and put the details in writing. Bring the questions from this guide, because we’d rather answer them before you sign than after.
Visit Solar Saint or call or text 808-746-7707 to schedule your free consultation.