Article Summary:
- The solar installation process in Hilo involves multiple distinct phases—from site assessment through HECO Permission to Operate—and each one has its own timeline and requirements
- Hawaii County permitting and HECO interconnection add steps that don’t exist in most mainland markets, and understanding them prevents frustration
- Knowing what questions to ask at each phase helps you stay informed and catch potential issues before they become problems
- Realistic timelines in Hilo run longer than many contractors initially suggest—understanding why helps you plan accordingly
- What happens after installation day matters as much as the installation itself—monitoring, inspections, and long-term support are all part of the picture
- A homeowner who understands the full process is better positioned to hold their contractor accountable at every step
Most people who go solar spend a lot of time researching before they hire anyone—comparing quotes, reading reviews, learning about panel efficiency and battery storage. Then they sign a contract and suddenly realize they don’t actually know what happens next. When will someone show up? What does the permit process involve? How long until the system is actually turned on? Why is HECO taking so long?
If that sounds familiar, this article is for you.
Going solar in Hilo is not a single event. It’s a process with multiple phases, multiple parties involved, and a timeline that spans weeks to months from the day you sign a contract to the day your system is generating power and feeding into your HECO account. That timeline isn’t a sign that something is wrong—it’s the reality of doing solar correctly in Hawaii, where permitting, inspections, and utility interconnection each add steps that simply don’t exist in most mainland markets.
Understanding the full process before you hire anyone gives you two advantages. First, it sets accurate expectations so you’re not caught off guard or wondering why nothing seems to be happening two months after you signed. Second, it gives you a framework for evaluating how well your contractor is managing the process—because a contractor who keeps you informed, hits reasonable milestones, and handles problems proactively is demonstrating the kind of professionalism that predicts a good long-term relationship.
This guide walks through the entire process from initial contact through your first year of solar ownership, with specific attention to what makes Hilo different from a standard solar installation market.
Phase One: Initial Contact and Consultation
The process starts before anyone visits your home. How a solar contractor handles the initial contact and consultation phase tells you a great deal about how they’ll manage the rest of the project.
What a Good First Consultation Looks Like
A legitimate solar contractor in Hilo will want to understand your energy situation before proposing anything. In the first conversation—whether it’s a phone call, an email exchange, or an in-person meeting—expect a good contractor to ask:
- How much do you currently pay for electricity monthly, and do you have 12 months of HECO bills available?
- Do you own your home outright, or do you have a mortgage?
- Are you interested in battery storage in addition to solar panels?
- Do you have any upcoming major changes to your electricity usage—an electric vehicle, a pool, adding air conditioning to rooms that don’t currently have it?
- What’s your primary goal—minimizing monthly bills, achieving energy independence, reducing your environmental footprint, or some combination?
These questions matter because they shape the system design. A contractor who jumps straight to quoting system sizes and prices without understanding your usage and goals is working from assumptions that may not fit your actual situation.
Red Flags in the Initial Consultation
Certain behaviors in the initial consultation are worth noting as potential warning signs:
A salesperson who pushes hard to schedule an in-home appointment immediately, before you’ve had any meaningful conversation about your situation, is prioritizing a sales opportunity over your actual needs. That pressure doesn’t get better as the process goes on.
A contractor who quotes you a system size and price over the phone without seeing your bills or your roof is giving you a number that may have no relationship to what you actually need or what the installation will actually cost. Those numbers sometimes get revised significantly—upward—once a site assessment happens.
Conversely, a contractor who takes time on the phone to understand your goals, explains what information they’ll need to prepare an accurate proposal, and sets clear expectations for what the consultation process involves is showing you something real about how they work.
Phase Two: The Site Assessment
Before any legitimate solar contractor in Hilo prepares a final proposal, they need to visit your property in person. This is called a site assessment, and it’s a non-negotiable step in doing solar right.
What Happens During a Site Assessment
A thorough site assessment for a Hilo home typically involves several distinct activities:
Roof evaluation. The contractor or a member of their technical team will assess your roof’s condition, orientation, and physical suitability for solar mounting. They’ll look at the roofing material type, estimate its remaining useful life, evaluate the pitch and orientation of different roof planes, and identify any obstructions—vents, chimneys, skylights—that affect usable panel area. In Hilo, this evaluation also includes looking at the roof’s condition relative to persistent moisture exposure—checking for rust on metal roofing, examining flashing details, and assessing any areas of existing water damage or wear.
Shading analysis. A proper shading analysis involves evaluating your roof across different times of day and different seasons to understand when and how shade affects potential panel locations. Tools like a Solmetric SunEye or Solar Pathfinder, or digital shading analysis through solar design software, produce data about shading patterns that directly inform panel placement and system design. In Hilo, where lush vegetation grows quickly and neighboring trees can create meaningful shading on east-facing roofs, this step deserves careful attention.
Electrical panel review. Your contractor will look at your main electrical panel to assess its capacity, available space for new breakers, and whether any upgrades are needed to accommodate the solar system’s output. Older homes in Hilo sometimes have panels that need upgrading before solar can be safely added—either due to age, capacity limitations, or code compliance issues. Finding this out during the site assessment, rather than on installation day, allows it to be properly planned and budgeted.
Structural assessment. For most standard residential roofs in good condition, a detailed structural engineering assessment isn’t required. But for older homes with potentially weakened framing, flat roofs where ballasted systems add significant weight, or installations where the panel layout concentrates load in specific areas, a structural review may be warranted. An experienced local contractor will recognize when this is needed and either have the capability in-house or work with a structural engineer they trust.
Utility consumption review. The contractor should review 12 months of your actual HECO bills during or after the site assessment. This gives them your actual usage patterns—not just your average monthly consumption, but how your usage varies across seasons, what your highest-demand months look like, and how your usage compares to what a proposed system would generate under Hilo’s specific solar resource conditions.
How Long a Site Assessment Takes
A thorough site assessment for a residential property in Hilo typically takes one to two hours. If someone is in and out in 20 minutes and immediately sitting down to show you a proposal they clearly prepared before the visit, the assessment wasn’t thorough—it was a formality preceding a sales pitch.
After the site assessment, expect the contractor to take some time to prepare a proposal—days, not hours. A proposal that arrives minutes after a site visit was not generated based on what was actually observed on your property.
Phase Three: Reviewing the Proposal
The proposal is where the details of your specific system are laid out. Reviewing it carefully before signing is one of the most important things you’ll do in the entire process.
What a Complete Proposal Should Include
A well-prepared solar proposal for a Hilo home should contain all of the following:
System design overview. A diagram showing panel layout on your actual roof, with panel count, placement, and orientation clearly illustrated. This should reflect your actual roof geometry and the shading analysis results—not a generic layout that could apply to any house.
Equipment specifications. Specific make and model numbers for panels, inverters, racking hardware, and any monitoring equipment. Not brand names with vague descriptions—actual model numbers you can research independently.
Production estimate with stated assumptions. The estimated annual energy production in kilowatt-hours, along with the specific inputs used to generate that estimate: peak sun hours per day, system losses factor, shading adjustment, and the software tool used. For Hilo, peak sun hour assumptions should reflect east Big Island conditions.
12-month consumption analysis. A comparison of your estimated system production against your actual consumption from 12 months of HECO bills, showing projected annual offset percentage.
HECO tariff and interconnection information. Which HECO program your system will be placed on, how that program compensates for any excess generation, and how that affects the system sizing recommendation.
Complete cost breakdown. Line items for equipment, labor, permitting fees, HECO interconnection fees, any electrical panel upgrades, and other project costs. No lump-sum pricing that obscures what you’re actually paying for.
Warranty summary. Panel product and performance warranty terms, inverter warranty, racking warranty, and the contractor’s workmanship warranty—duration and what’s covered.
Financing options. If financing is offered, complete terms including interest rate, loan term, monthly payment, and explicit disclosure of any dealer fees built into the loan.
Project timeline. A realistic estimate of time from contract signing to Permission to Operate, with milestones for permit submission, expected permit approval, installation, inspection, and HECO interconnection.
References. A statement that references from recent Hilo customers are available upon request, or actual reference contact information.
Taking Time to Review
You should take at minimum several days to review a solar proposal before signing anything. Any contractor who applies meaningful pressure to sign immediately—same-day discounts, installation slot urgency, pricing that expires tomorrow—is not a contractor whose long-term relationship with you is going to feel good.
Read the proposal carefully. Ask questions about anything that isn’t clear. If something in the proposal differs from what was discussed during the site assessment or initial consultation, ask for an explanation before you sign.
Phase Four: Contract Signing and Project Kickoff
Once you’ve reviewed the proposal, asked your questions, and decided to move forward, the next step is signing a contract and making any required deposit payment.
What the Contract Should Cover
A solar installation contract is a legally binding document, and it should protect you as clearly as it protects the contractor. Before signing, confirm the contract includes:
Specific equipment listed by make and model. The contract should reference the same equipment specified in the proposal. A clause that allows the contractor to substitute “equivalent” equipment without your approval is one you should push back on or negotiate to require your written consent for any substitutions.
Project scope and inclusions. Everything included in the project should be explicitly stated—permits, interconnection application, electrical panel upgrades if applicable, monitoring system setup, and any other scope items discussed.
Payment schedule tied to project milestones. Avoid contracts that front-load payments heavily before work begins. A reasonable payment structure might be a deposit at signing, a payment at permit approval or equipment delivery, and a final payment at Permission to Operate or system commissioning. This gives you financial leverage if the contractor fails to complete the project.
Timeline commitments. While exact dates are hard to guarantee given Hawaii County permit wait times and HECO queue times, the contract should include reasonable milestone targets and provisions for what happens if the project runs significantly beyond those targets.
Workmanship warranty terms. The warranty should be written into the contract, not just referenced verbally. Confirm the duration, what’s covered, and the process for making a warranty claim.
Cancellation and dispute resolution provisions. Understand what your rights are if you need to cancel, and how disputes are handled—whether through mediation, arbitration, or other processes.
The Deposit
Most solar contractors require a deposit at signing, typically ranging from 10% to 30% of the total project cost. A deposit in that range is standard and reasonable. A request for 50% or more of the project cost upfront before any permits are filed or equipment ordered should give you pause—it front-loads risk onto you before the contractor has committed significant resources to your project.
Phase Five: Permitting and Equipment Procurement
After the contract is signed and the deposit is paid, two parallel tracks typically begin: the permit application process and equipment procurement. This phase is often the longest in the overall timeline, and it’s the one where homeowners most commonly feel like nothing is happening.
Hawaii County Permit Application
Your contractor prepares and submits a building permit application to Hawaii County’s Department of Public Works. For solar installations, this application includes:
- Architectural/structural drawings showing panel layout and mounting details
- Electrical single-line diagrams showing system interconnection
- Equipment specifications and cut sheets for major components
- Structural calculations demonstrating that the mounting system meets Hawaii County wind and load requirements
- Manufacturer installation documentation for racking hardware
The quality of the permit application matters significantly for timeline. A complete, correctly prepared application that addresses all of Hawaii County’s requirements moves through the review process without being sent back for corrections. An incomplete or incorrectly prepared application gets returned—sometimes multiple times—adding weeks or months to the pre-installation wait.
A contractor who has submitted many permits to Hawaii County knows what the plan reviewers look for and prepares applications accordingly. Ask your contractor how many permits they’ve submitted to Hawaii County in the past year, and what their typical experience has been with first-submission approval rates.
Realistic Permit Timeline Expectations
Hawaii County permit wait times for solar installations have historically varied. In periods of high application volume, wait times for permit approval can stretch to several months. In quieter periods, turnaround can be faster. Your contractor should give you a realistic estimate based on current conditions—not an optimistic projection designed to keep you happy through the signing process.
If permit approval is taking longer than expected, ask your contractor for a status update including the date the application was submitted and whether they’ve received any requests for additional information from the plan reviewer. Contractors who are actively managing your permit process will have current information. Those who aren’t may have to look it up.
HECO Interconnection Application
Simultaneously with the county permit process, your contractor should submit the interconnection application to Hawaiian Electric. HECO’s interconnection process for Big Island residential customers involves:
- Initial application submission with system design details
- HECO technical review to confirm the proposed system meets interconnection standards
- Conditional approval with any required modifications noted
- Final approval after permit and inspection are complete
HECO’s interconnection queue on the Big Island has its own wait times that operate independently of Hawaii County’s permit timeline. Your contractor should be monitoring both processes and keeping you updated on where each one stands.
The HECO interconnection application is also where your tariff program placement is determined. Understanding which program you’re being placed on—and confirming it matches what was discussed in the proposal—is something to confirm at this stage, not after installation.
Equipment Procurement
While permits are being processed, your contractor orders the equipment for your installation. For most standard residential systems using in-stock equipment from established distributors, procurement timelines are typically a few weeks. For specific premium equipment, equipment being shipped to the Big Island, or any supply chain disruptions, lead times can be longer.
Ask your contractor to confirm when equipment has been ordered and when delivery is expected. Some contractors don’t order equipment until permit approval is received—a conservative approach that avoids warehousing costs and the risk of equipment sitting in storage if permit approval takes longer than expected. Others order upon contract signing to minimize installation delay once permits come through. Both approaches are reasonable; what matters is that you know which one your contractor is using so your timeline expectations are accurate.
Phase Six: Pre-Installation Preparation
As permit approval approaches and equipment arrives, your contractor should begin scheduling the installation and communicating specifics about what to expect on installation day.
What You Should Be Told Before Installation Begins
A professional contractor will communicate the following before scheduling installation:
Installation date and duration. When will the crew arrive, and how many days is the installation expected to take? For a typical residential system in Hilo, installation runs one to three days depending on system size, roof complexity, and any electrical panel work required.
Crew composition. How many people will be on site, and what roles will they be performing? A standard installation crew typically includes a lead installer, one or more panel installers, and an electrician for the electrical work.
Site access requirements. Will the crew need access to your attic? Your main electrical panel? Specific areas around the exterior of the home for conduit runs? Will they need to move or temporarily cover landscaping near the work area?
Utility shutdown periods. There will be periods during installation when your main electrical service needs to be temporarily shut off to safely complete the electrical interconnection work. This typically takes a few hours. Knowing when this will happen lets you plan accordingly—refrigerator contents, any medical equipment that requires power, work-from-home considerations, and similar practical matters.
What you need to do, if anything. Most installations require minimal preparation from the homeowner. But if there are any specific access requirements, items to move, or pets to secure during roof work, your contractor should communicate this clearly in advance.
If Your Roof Needs Preparation
In some cases—particularly for older Hilo homes where the site assessment identified concerns about roof condition—the contractor may recommend or require roof repair work before solar installation proceeds. This could mean patching areas of rust or deterioration on metal roofing, replacing damaged tiles, or addressing existing flashing issues.
If this applies to your situation, clarify before installation scheduling whether your solar contractor is handling this work, whether they’re coordinating a separate roofing contractor, or whether this is something you need to arrange independently. Also clarify how any roof preparation work affects the project timeline and whether it changes the project cost.
Phase Seven: Installation Day
Installation day is the most visible part of the process—the day things actually happen on your roof. Knowing what to expect makes it less disruptive and helps you notice if something seems off.
What Good Installation Practice Looks Like
A professional solar installation crew arrives with the equipment and tools needed to complete the job as planned. They introduce themselves, confirm access requirements, walk you through what they’ll be doing, and establish a communication point—who to talk to if you have questions during the day.
On the roof, the installation sequence typically goes:
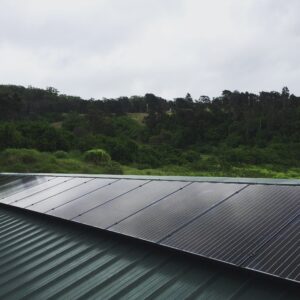
Mounting hardware installation first. Before any panels go up, the racking and mounting hardware is attached to the roof. For rail-based systems, this means setting the roof attachments, attaching horizontal rails, and confirming the layout matches the permitted design. The specific mounting approach varies by roof type—rib-mounted hardware for corrugated metal, seam clamps for standing seam, tile hooks for concrete or clay tile, and so on.
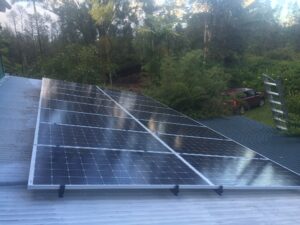
Panel installation. Once the racking is in place, panels are lifted to the roof and attached to the rails or mounting frames. Panels should be handled carefully to avoid scratching the anti-reflective coating or stressing the frame. Connecting cables between panels—using waterproof MC4 connectors rated for outdoor UV exposure—happens at this stage as well.
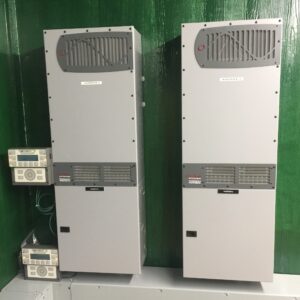
Electrical installation. The DC wiring from the panels runs down to the inverter location, typically on an exterior wall near the main electrical panel. Conduit for this wiring should be properly supported, weatherproofed at entry points, and routed in a way that’s code-compliant and, ideally, reasonably neat in appearance. The inverter is mounted and wired, disconnects and overcurrent protection are installed, and the connection to your main electrical panel is completed—including the required rapid shutdown system that allows the system to be de-energized safely in emergencies.
Commissioning and testing. Before leaving, the crew should power up the system and confirm it’s operating correctly—checking panel output, confirming inverter startup sequence, verifying monitoring connectivity, and testing rapid shutdown functionality.
What to Watch For During Installation
You don’t need to supervise every minute of the installation, but staying reasonably aware of what’s happening on your roof is reasonable.
Things worth noting: Are crew members walking on your roof in a way that seems careless or is causing obvious damage? Is the conduit routing clean and properly supported, or is it running haphazardly? Are roof penetrations being sealed as they’re created, or are open holes left unattended? Is the crew working safely with appropriate fall protection?
If you notice something that concerns you, say something to the lead installer or project manager. A professional crew will welcome the question or correct any issue without defensiveness.
Cleanup and Walkthrough
At the end of installation, the crew should remove all packaging materials, debris, and tools from your property. Scrap conduit, cardboard, plastic packaging, wire offcuts—all of it should leave with the crew.
Before the crew leaves, ask for a brief walkthrough of what was installed. Where is the inverter? Where are the disconnects? Where is the monitoring equipment? How do you access the monitoring system? What do the indicator lights on the inverter mean under normal operation, and what should prompt a call to the contractor?
Getting this information on installation day, when the people who did the work are standing in front of you, is far more valuable than trying to figure it out later from a manual.
Phase Eight: Inspection
After installation is complete, the system cannot be turned on and connected to the grid until it passes a Hawaii County building inspection. Your contractor is responsible for scheduling this inspection and ensuring the installation is ready for it.
What the Inspector Reviews
A Hawaii County building inspector reviewing a solar installation is checking that the work matches the permitted plans and complies with applicable building and electrical codes. This includes:
- Panel layout and placement matches the permitted drawings
- Electrical work meets NEC requirements as adopted by Hawaii, including wire sizing, conduit fill, grounding, and labeling
- Rapid shutdown system is installed and properly labeled
- All required disconnects are present and accessible
- Conduit and wiring are properly supported and protected
- Any structural mounting calculations are reflected correctly in the actual installation
If the Inspection Fails
Failed inspections happen, even with good contractors. Common reasons include minor labeling requirements that weren’t quite right, a disconnect location that doesn’t meet accessibility requirements, or a conduit run that needs additional supports. These are typically correctable quickly.
Your contractor should notify you promptly if an inspection fails, explain what needs to be corrected, and schedule the re-inspection without significant delay. How a contractor handles a failed inspection tells you something about their professionalism—it’s a normal part of construction, and contractors who treat it as such and resolve issues efficiently are demonstrating good operational practice.
After Inspection Approval
Once the inspection passes, your contractor completes any remaining interconnection documentation and submits it to HECO to request Permission to Operate. This is the final step before your system can be legally connected to the grid and generation begins.
Phase Nine: HECO Permission to Operate
Permission to Operate (PTO) from Hawaiian Electric is the formal authorization that allows your solar system to be connected to the grid. Until PTO is granted, your system should not be operating in grid-tied mode—doing so without authorization is a violation of your interconnection agreement.
How Long PTO Takes
HECO’s review and approval process for residential PTO requests on the Big Island varies. In straightforward cases where the installed system matches the approved interconnection application exactly and all documentation is in order, approval can come within a few weeks. In cases where there are discrepancies between what was applied for and what was installed, or where HECO has questions about the application, the process can take longer.
Your contractor should be actively managing the PTO process and following up with HECO on your behalf. Ask for regular updates if you don’t hear anything for more than two weeks after the county inspection passes.
What Happens After PTO
Once HECO grants Permission to Operate, your system is officially interconnected. Your contractor or the inverter manufacturer’s monitoring platform will confirm that the system is exporting to the grid correctly. From this point forward, your HECO meter is running in both directions—measuring what you consume from the grid and what you send back to it.
Your contractor should walk you through what your first HECO bill with solar will look like—how generation is credited, what charges remain fixed regardless of solar production, and how to read your new HECO statement. This conversation saves considerable confusion when that first bill arrives and looks different from what you expected.
Phase Ten: Monitoring and Your First Months of Solar Ownership
The installation is complete, PTO is granted, and your system is generating power. Now begins the ongoing phase of solar ownership—and what you do in the first few months shapes your long-term experience.
Setting Up and Using Your Monitoring System
Most solar systems installed in 2025-2026 include a monitoring platform that shows your production data in real time or near-real time through a smartphone app or web portal. Your contractor should have set this up as part of commissioning and walked you through how to use it.
In your first weeks of solar ownership, spend some time getting familiar with your monitoring data. Learn what your system’s typical daily production curve looks like on a clear day—production rises from zero in the morning, peaks around midday, and declines in the afternoon. On Hilo’s typical partly cloudy days, you’ll see more variability with production fluctuating as clouds pass. On heavy rain days, production will be noticeably lower but not zero.
Understanding your baseline helps you recognize when something is wrong. If your system suddenly produces significantly less than usual on a day with similar weather to prior high-production days, that’s worth investigating.
What Good Production Looks Like in Hilo
Your contractor’s production estimate gives you an annual kWh target, but actual production varies significantly month to month in Hilo. Generally speaking, production is higher in the drier summer months and lower during the wetter winter and spring. Vog events can cause noticeable but usually temporary production dips. Weeks of persistent trade wind cloud cover will show up in your monitoring data as consistently lower production than clear-day peaks.
Don’t evaluate your system’s performance based on a single day or even a single week. Monthly totals compared to your contractor’s monthly production estimates give a more meaningful picture. After 12 months of operation, you have a full annual comparison against the estimates you were given.
If your annual production is consistently running 10-15% or more below estimates, that’s worth discussing with your contractor—it may indicate a system issue, an inverter fault, soiling on the panels, or new shading that wasn’t present when the system was designed.
HECO Bill Changes to Expect
Your HECO bill with solar looks different from what you’re used to. Some charges are reduced by your solar generation. Others—fixed customer charges, certain infrastructure fees—remain regardless of how much your panels produce. Understanding this distinction prevents the frustration of expecting a $0 bill and receiving something else.
Under the Customer Self-Supply (CSS) tariff that most new Hilo residential customers are placed on, the financial benefit of your solar system comes primarily from the energy you generate and consume directly, rather than from credits for energy you export to the grid. This is why system sizing to match your consumption matters—every kWh your panels produce while your home is consuming power offsets a kWh you would otherwise have purchased from HECO at retail rates.
Your contractor should have walked you through this when they explained your tariff, and should do so again when your first bill arrives if needed.
Realistic Timeline: From Signing to First Generation
One of the most common sources of frustration in the solar process is the gap between when a homeowner signs a contract and when their system is actually generating power. Setting accurate expectations upfront prevents that frustration.
For a residential solar installation in Hilo in 2026, a realistic timeline from contract signing to Permission to Operate typically looks like this:
Weeks 1-2: Contract execution, deposit payment, permit application preparation and submission, HECO interconnection application submission, equipment procurement initiated.
Weeks 2-10: Hawaii County permit review and approval. This is the most variable phase. A complete, well-prepared application in a period of normal permit volume may be approved in 4-6 weeks. During periods of higher volume or if the application requires clarification, this can extend to 8-12 weeks or more.
Weeks 2-8 (parallel): HECO interconnection application review and conditional approval. This runs simultaneously with the county permit process and may resolve faster or slower depending on HECO’s current queue.
After permit approval: Equipment delivery confirmation (if not already on-site) and installation scheduling. Installation typically within 1-3 weeks of permit approval depending on crew scheduling.
Installation: 1-3 days on-site work depending on system size and complexity.
Post-installation: County inspection scheduling and completion. Typically 1-3 weeks after installation depending on inspector availability.
After inspection approval: HECO final documentation submission and Permission to Operate review. Typically 2-6 weeks.
Total realistic range: 3 to 6 months from contract signing to Permission to Operate, with some projects falling outside this range in either direction depending on permit timing, HECO queue, and project-specific factors.
Any contractor who quotes you a 6-week turnaround from contract to PTO in Hilo without a very specific explanation of how they’re achieving that is giving you an optimistic number that doesn’t reflect how this market typically operates. That doesn’t mean fast timelines are impossible—it means treating them as the baseline expectation rather than an optimistic scenario leads to disappointment.
What Ongoing Support Should Look Like After Installation
Your relationship with your solar contractor shouldn’t end on installation day or even on the day PTO is granted. A contractor worth hiring maintains an ongoing service relationship with their customers.
Year One Check-In
Some contractors offer a scheduled system check in the first year—a visit to inspect mounting hardware, check electrical connections, verify production data matches expectations, and clean panels if needed. Ask whether your contractor offers this and whether it’s included in the project cost or billed separately.
Even if a formal check-in isn’t standard practice, your contractor should be reachable for questions during your first year of solar ownership. Learning how to read your monitoring data, understanding your new HECO bills, and troubleshooting any unexpected production dips are all reasonable things to contact your contractor about in the first 12 months.
Responding to System Issues
Modern solar systems are generally reliable, but issues do occur—inverter faults, monitoring connectivity problems, physical damage from extreme weather events. Your contractor should have a clear process for responding to service requests, and response time expectations should be realistic for Hilo’s market.
Ask before installation: if my inverter shows an error code, what’s the process for getting it looked at? How quickly should I expect a response? Is warranty service included at no charge, or are there service call fees?
A contractor who can answer these questions clearly, with specific information about response time standards and warranty service terms, is one who has thought about the post-installation relationship. One who gives vague assurances about “taking care of you” without specifics may not have a systematic service process in place.
Planning for Future Changes
Your energy situation will likely change over the years—adding an electric vehicle, installing a pool, adding air conditioning, or other changes that increase your consumption. A good contractor relationship means you have someone to call when those changes are coming, so you can think through whether your existing system handles the new load or whether adding panels or battery storage makes sense.
Similarly, if your roof eventually needs replacement—a realistic consideration for older Hilo homes—your contractor should be your first call to discuss the logistics and cost of temporarily removing and reinstalling your solar system.
A Note on Communication Expectations
Throughout every phase described in this guide, communication from your contractor is the thread that holds the experience together. A contractor who proactively updates you on permit status, who tells you when equipment has arrived, who gives you advance notice about installation scheduling, and who reaches out promptly when there’s a delay or complication is a contractor managing your project well.
A contractor who goes silent for weeks at a time, who requires you to chase status updates, who explains delays only when directly asked, and who provides reactive rather than proactive communication is demonstrating an operational pattern that tends to get worse, not better, as projects progress.
If communication problems emerge early—during the permitting phase, before any physical work has started—address them directly with your contractor. Express your expectations clearly and ask for specific update intervals. If the communication pattern doesn’t improve, you’re getting a preview of what warranty service and post-installation support will look like.
The solar installation process in Hilo involves enough moving parts and enough waiting that good communication isn’t a luxury—it’s a basic professional obligation.
Ready to Start? Here’s What Your First Step Looks Like
Now that you know what the full process involves, the first step is finding a contractor you trust enough to start it with.
At Solar Saint, we walk every Hilo homeowner through exactly what to expect before they sign anything—realistic timelines, permit process specifics, HECO interconnection details, and what life looks like with solar once the system is running. We believe an informed customer makes a better decision and has a better long-term experience, so we don’t shy away from the complexity. We explain it.
From your first site assessment through your Permission to Operate and beyond, we manage the process, communicate proactively, and stay available long after installation day.